Set daily reminders, prayer-specific notifications, and anniversary alerts to stay consistent in prayer.
Daily Reminder
Set a time to be reminded to pray each day. Enable this in Settings > Daily Reminder and choose your preferred time. A notification will appear at the chosen time with a prompt to open the app and pray.
Evening Reminder
A second, separate reminder for evening prayers. This can be configured independently of the daily reminder, so you can set both a morning and evening prayer time if you wish.
Prayer-Specific Reminders
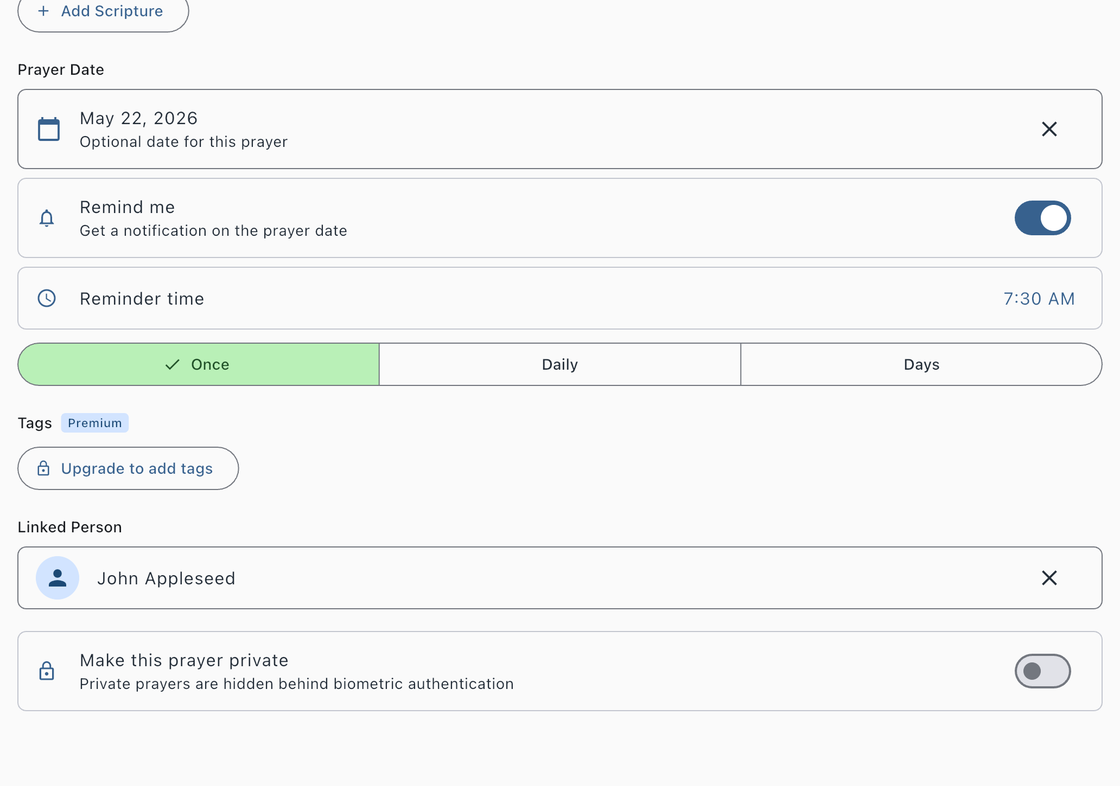
Individual prayers can have their own reminders, configured when you set a prayer date on the prayer form. When you enable the Remind me toggle, you can choose from three repeat options:
- Once — A single notification on the prayer date at your chosen time. Useful for prayers tied to specific events such as a surgery, job interview, or trip.
- Daily — A recurring notification every day at your chosen time. Useful for prayers you want to lift up consistently.
- Custom Days — Choose specific days of the week (Sunday through Saturday) to receive a notification. Useful for prayers you want to focus on certain days, such as praying for your small group on the day it meets.
Each reminder includes a time picker so you can set the exact hour and minute for your notification. When a reminder is active, a green dot appears on the prayer card’s date indicator.
Anniversary Reminders
When you mark a prayer as answered, Answered List automatically schedules a notification for one year later. On the anniversary, you will receive a reminder to look back at what God has done and give thanks. This is a meaningful way to celebrate answered prayers over time.
Managing Reminders
When a prayer is archived, deleted, or marked as answered, all of its active reminders are automatically cancelled. You can also disable a prayer-specific reminder by editing the prayer and toggling off Remind me.
Make sure notifications are enabled for Answered List in your device settings. If reminders are not appearing, see the Troubleshooting page for help.